Travel First Aid Kits: What to Pack and What to Skip (2025 Guide)
Introduction
Most travelers fall into one of two camps when it comes to first aid: they either bring an entire pharmacy or they bring nothing at all. Neither approach works well. A good travel first aid kit isn’t about being ready for a wilderness surgery. It’s about handling the small, annoying problems that can derail a day or two of your trip. A blister on day one of a walking tour. A headache after a long flight. Stomach trouble from trying that street food you were warned about.
This guide is for anyone who wants a practical, compact kit that actually gets used. Whether you’re a solo backpacker, a parent packing for a family trip, or an adventure traveler heading off the grid, the goal is the same: pack smart, not heavy. We’ll cover the travel first aid kit essentials you genuinely need, what you should leave behind, and how to decide between buying a pre-made kit or building your own. No fluff. Just real advice from someone who’s spent years helping travelers prepare for the unexpected.
Why Most Travel First Aid Kits Miss the Mark
Walk into any pharmacy or browse Amazon, and you’ll find dozens of pre-packaged first aid kits. They look complete. They promise peace of mind. But open one up, and you’ll often find a bunch of stuff you’ll never use: tiny gauze pads that don’t stick to anything, a single adhesive bandage in a weird size, and a roll of medical tape that’s more trouble than it’s worth. These kits are designed to look comprehensive, not to be practical for actual travel.
On the flip side, some travelers skip a kit entirely because they assume they’ll just buy what they need at the destination. That works fine in a major city, but try finding a pharmacy at 10 PM in a small Italian village or a remote national park. Even when you can find one, you’re paying tourist prices and losing precious trip time.
The real problem is that most people don’t think about what they actually need until something goes wrong. Then they’re scrambling. A smarter approach is to build a small, targeted kit that covers the most common travel ailments without weighing you down. For those who plan ahead, a good starting point is to browse travel first aid kits to see what’s available.
Travel First Aid Kit Essentials: The Core 10 Items
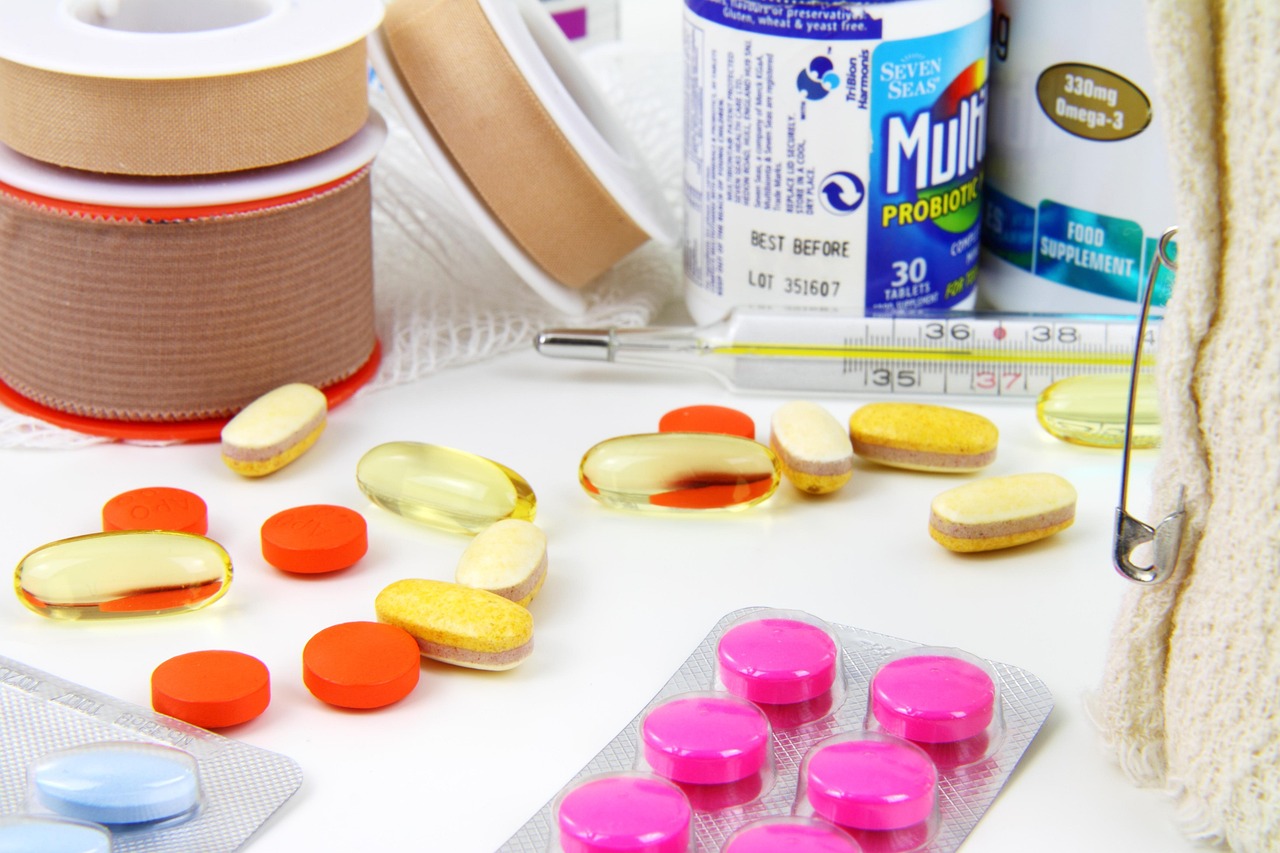
When you’re building your travel first aid kit essentials, focus on items that solve the most frequent travel problems. Here are the ten items I always pack, with a quick explanation of why each one earns its place in your bag.
- Bandages (various sizes): For covering cuts and blisters. Get a mix of standard and larger ones. Blisters are the number one complaint from travelers on foot.
- Antiseptic wipes: For cleaning a wound before bandaging. Way more practical than carrying a bottle of liquid antiseptic. Takes up almost no space.
- Pain reliever (ibuprofen or acetaminophen): Headaches, muscle aches, toothaches. Ibuprofen also helps with inflammation. Pack a small travel-sized bottle, not the whole Costco container.
- Blister treatment (moleskin or blister plasters): This is non-negotiable for anyone doing a lot of walking. Moleskin can be cut to size and prevents blisters before they form. Blister plasters work great for ones you already have.
- Tweezers: Splinters, ticks, and tiny debris. A good pair of tweezers is one of the most versatile tools in any kit.
- Antihistamine (cetirizine or loratadine): Allergies can hit anywhere. New foods, unfamiliar plants, hotel dust, or even a different climate can trigger a reaction. Non-drowsy formulas are your friend.
- Anti-diarrheal (loperamide): Traveler’s diarrhea is common. Having this on hand can save a day of your trip. Don’t leave home without it.
- Rehydration salts: If you do get stomach trouble, rehydration salts are more effective than just drinking water. They’re tiny packets that take up zero space.
- Hand sanitizer: For when soap and water aren’t available. Use it before eating street food or after using a public bathroom in a pinch.
- Small scissors: For cutting moleskin, trimming bandages, or opening stubborn packaging. Get a compact pair that fits in your kit.
That’s your core. These ten items cover about 90% of the minor medical issues you’ll encounter while traveling. Everything else is situational.
What to Skip: The Items You Don’t Need in a Travel Kit
Just as important as knowing what to pack is knowing what to leave behind. Travel space is precious, and every unnecessary item is weight you don’t need. Here’s what I see travelers packing that they almost never use.
Bulky gauze rolls and large splints. Unless you’re doing serious backcountry first aid, you’re not going to need to build a field splint. A few large sterile gauze pads are fine for moderate bleeding, but skip the whole roll. It takes up too much space for something you’ll likely never use.
Full-sized bottles of anything. That 16-ounce bottle of ibuprofen? Leave it at home. Buy travel-sized containers or decant into smaller bottles. The same goes for antiseptic and hand sanitizer. Weight adds up fast.
Medical tape rolls. A small roll can be useful, but most pre-made kits include a giant roll that’s impossible to use neatly. If you really need tape, buy a mini roll or use a few pre-cut strips. Honestly, most minor cuts just need a bandage, not tape.
Surgical masks (post-pandemic). While masks are sometimes required in healthcare settings, carrying a pack of them in your first aid kit is unnecessary for most trips. If you need one, buy a single pack at your destination. They’re widely available.
CPR masks and tourniquets. Unless you’re a trained wilderness first responder, these are overkill. Tourniquets in particular are dangerous if used incorrectly. A standard first aid kit for travel is for minor issues, not major trauma.
Remember: every ounce you save is candy you can buy at the airport.
Pre-Made Kits vs. DIY: Which Is Right for You?
This is the big question. You can buy a ready-made kit or build one yourself. Both have pros and cons, and the right choice depends on your travel style and priorities.
Pre-made kits are convenient. You open the box, and everything is there. No hunting around for individual items. They usually come in a nice case that keeps things organized. The downside is that you don’t get to choose the contents. Many kits include filler items you don’t need and leave out things you do. Quality varies wildly between brands.
DIY kits give you total control. You pick exactly what goes in and leave out anything you won’t use. You can customize for your specific destination and activities. The downside is that it takes more effort. You have to buy items individually, and finding a good container can be a pain.
Here’s a simple decision framework. Go pre-made if you want simplicity and don’t mind paying a bit extra for convenience. It’s a great option for casual travelers, families, or anyone who just wants to grab and go. A couple of trusted brands include ADVENTURE MEDICAL KITS for rugged trips and Surviveware for family-friendly options. For basic needs, the Johnson & Johnson kit works fine for city breaks.
Go DIY if you have specific medical needs, allergies, or are traveling to a remote area where you can’t easily buy replacements. It’s also better if you’re a frequent traveler and want a kit you can add to and modify over time. The upfront effort pays off in the long run.
Best Pre-Made Travel First Aid Kits for 2025
If you decide to go pre-made, not all kits are created equal. Here are three solid options based on actual use cases, not just product descriptions.
ADVENTURE MEDICAL KITS Ultralight / Watertight .7
This is the go-to for serious hikers and backpackers. It’s small, lightweight, and the contents are curated by medical professionals. It includes wound care supplies, blister treatment, and medication. The case is resealable and waterproof. Best for rugged trips where weight matters. Downside: it’s pricey for the size, and some items are in tiny single-use packets that can be annoying to open. Check current price on Amazon.
Surviveware Small First Aid Kit
This is the most versatile option for families and general travelers. It’s organized with clear pouches, so you can find what you need quickly. The kit includes a good mix of bandages, antiseptic, medications, and even a CPR mask (which you can remove if you want). The case is durable and well-made. Best for road trips, family vacations, and general international travel. Downside: it’s a bit bulkier than ultralight options. Check current price on Amazon.
Johnson & Johnson All-Purpose First Aid Kit
This is the budget-friendly option for city breaks and short trips. It’s widely available, cheap, and covers the basics: bandages, wipes, and a few medications. The case is a simple plastic box. Best for when you just want something small and don’t want to think about it. Downside: the contents are minimal, and you’ll likely want to supplement with a few extra items like blister treatment and antihistamines. Check current price on Amazon.
How to Build Your Own Travel First Aid Kit (DIY Guide)
If you prefer total control over what goes in your kit, here’s a step-by-step process. It takes about 30 minutes and costs less than a pre-made kit in most cases.
Step 1: Choose your container. A small zip-off pouch or a lightweight waterproof bag works best. Look for something that’s roughly 6x4x2 inches. Transparent bags make it easier to see what’s inside without emptying everything.
Step 2: Pack the core 10 items. Refer to the list earlier in this article. Bandages, antiseptic wipes, pain reliever, blister treatment, tweezers, antihistamine, anti-diarrheal, rehydration salts, hand sanitizer, and small scissors. Buy these items individually from a pharmacy or Amazon. Look for travel-sized versions.
Step 3: Add optional items based on your destination. This is where the customization happens. For tropical trips, add mosquito repellent and an antifungal cream. For cruises, add motion sickness tablets (meclizine or Dramamine). For hiking, add a larger moleskin patch and a tick removal tool. For international trips, consider adding a broad-spectrum antibiotic if you can get a prescription from your doctor.
Step 4: Organize and seal. Use small labeled pouches or simply group items by type. Make sure liquids are in sealed bags to prevent leaks. Check that nothing gets punctured by the scissors or tweezers.
Step 5: Store it in an easily accessible spot in your bag. Don’t bury it at the bottom of your suitcase. Put it in an outer pocket or a carry-on where you can reach it without unpacking everything.
That’s it. Your custom kit is ready. Travelers who need supplies like moleskin blister plasters and travel-sized ibuprofen can find what they need.
Destination-Specific Additions: What to Add for Different Trips
A one-size-fits-all kit works for basic needs, but certain destinations call for specific additions. Here are tailored suggestions for common trip types.
Beach / Tropical Trips:
Add an antifungal cream (for fungal infections common in humid environments) and a stronger insect repellent with DEET. If you’re prone to sunburn, consider small packets of aloe vera gel. Rehydration salts are even more critical here due to heat and potential food issues.
Hiking / Outdoor Adventures:
Your core kit needs a larger blister kit with moleskin and a few pre-cut moleskin strips. Add a tick removal tool if you’re in tick country. Bring a larger bandage (like a 3×4 inch) for scrapes from falls. Consider adding a small tube of antiseptic cream instead of just wipes.
City / Urban Travel:
Keep your kit small. Focus on pain relievers (for headaches from long days exploring), antihistamines (for food or dust allergies), and anti-diarrheal (for unfamiliar cuisine). Blister treatment is still useful if you’re walking a lot. You likely don’t need large bandages or moleskin for most city trips.
International / Remote Travel:
If you’re going somewhere with limited access to medical care, talk to your doctor about a travel prescription. This might include an emergency antibiotic like ciprofloxacin for travelers’ diarrhea or a broad-spectrum antibiotic for infections. Carry a digital thermometer and a small supply of oral rehydration salts. Know the local emergency number and the nearest reputable hospital.
Common Mistakes Travelers Make with First Aid Kits
Even with a good kit, small errors can make a big difference. Here are the mistakes I see most often.
Mistake: Forgetting to check expiration dates.
Pain relievers, antihistamines, and rehydration salts all expire. Check your kit every six months and replace anything that’s past its date. A kit full of expired medication is worse than no kit at all because you think you’re prepared.
Mistake: Not accounting for prescription medications.
If you’re on regular medication, keep it in the original bottle with the pharmacy label. TSA and international customs want to see that. Never pack prescription meds in a checked bag. Always keep them in your carry-on. Bring enough for your entire trip plus a few extra days.
Mistake: Packing liquids in checked luggage without protection.
Liquids can leak. Hand sanitizer, antiseptic wipes, and any liquid oral medications should go in a sealed plastic bag. Put that bag inside your first aid kit. Leaks can ruin other items in your bag.
Mistake: Ignoring temperature-sensitive items.
Some medications need to be kept cool. If you’re traveling to a hot climate, store items like insulin or certain antibiotics in an insulated bag with a cool pack. Check your medication labels for storage instructions.
Mistake: Buying your kit at the airport.
Airport convenience stores sell overpriced, poorly designed kits. You’ll pay three times what you’d pay at a pharmacy, and the contents are usually worse. Buy your kit before you leave. It’s one less thing to worry about at the airport.
Frequently Asked Questions About Travel First Aid Kits
Can I take my first aid kit in carry-on luggage?
Yes, with some restrictions. Scissors must be under 4 inches from the pivot point. Liquids in containers over 3.4 ounces must go in checked luggage. Medications are allowed in reasonable quantities, but keep them in original packaging. TSA does not generally worry about first aid kits, but customs officials in other countries might. When in doubt, keep it small and organized.
What if I have a chronic condition like diabetes or asthma?
You’ll need to carry a larger, condition-specific kit. For diabetes, include a small sharps container for needles, extra test strips, and glucose tablets. For asthma, carry a backup inhaler and a spacer if needed. Keep a doctor’s note with your prescription list. Airlines and border agents are used to this.
What’s the best first aid kit for a cruise?
Cruises are controlled environments with onboard medical facilities, so you don’t need a heavy kit. Focus on anti-diarrheal (stomach bugs spread quickly on ships), motion sickness tablets (especially for sea days), and pain relievers. Blister treatment is also useful for long walks on the ship or shore excursions.
Are prescription painkillers okay to travel with internationally?
It depends on the country. Narcotic painkillers are heavily regulated. If you have a prescription for a controlled substance, carry a letter from your doctor and keep the medication in the original pharmacy bottle. Check the laws of your destination countries. Some places, like Japan, have extremely strict rules about stimulants and certain pain medications.
Do I need a tourniquet in my travel first aid kit?
For the vast majority of travelers, no. Tourniquets are for life-threatening bleeding from major trauma. They are dangerous if used incorrectly and can cause nerve and tissue damage. If you’re a trained wilderness responder, then yes. Otherwise, stick to direct pressure and a bandage.
How often should I replace items in my kit?
Check every six months. Replace any expired medications. Change out anything that looks worn or has been opened. If you use an item on a trip, restock it when you get home. A half-full kit is not a kit.
Final Checklist: What Goes in Your Travel First Aid Kit
Here’s your quick-reference summary. Pack this base kit, then adjust based on your trip.
Must-haves: Bandages (various sizes), antiseptic wipes, pain reliever, blister treatment, tweezers, antihistamine, anti-diarrheal, rehydration salts, hand sanitizer, small scissors.
Conditional items: Mosquito repellent (tropical), motion sickness tablets (cruise), antifungal cream (beach), tick removal tool (hiking), digital thermometer (remote travel), prescription medications (always in original bottles).
Leave behind: Bulky gauze rolls, large splints, full-sized bottles, medical tape rolls, surgical masks (unless required), tourniquets (unless trained).
That’s it. A practical, compact, ready-to-use travel first aid kit that covers the real risks of travel without weighing you down. If you want a ready-to-go option that fits this philosophy, the Surviveware Small First Aid Kit is a solid choice for most travelers. For ultralight trips, check out the ADVENTURE MEDICAL KITS Ultralight. Either way, you’re now prepared for the small bumps every trip brings.
Shop Music Production Gear
Shop Music Production Gear
Shop Music Production Gear
Shop Music Production Gear
Shop Music Production Gear
Shop Music Production Gear
Shop Music Production Gear
Shop Music Production Gear